
Introduction
In-app purchases are a common way for developers to create a free application, and then provide users with options to upgrade through in-app purchases. Google Play in-app purchases are the simplest solution to selling digital products or content on Android apps. Therefore, many app developers who are looking to sell digital goods, or offer premium membership to users, use the Google Play in-app billing process for smooth and easy checkouts.
In-app purchases can be anywhere from a sword that gives you more power in a game, a key that unlocks more features of a free app, or conversion to virtual currency that can be used for purchases.
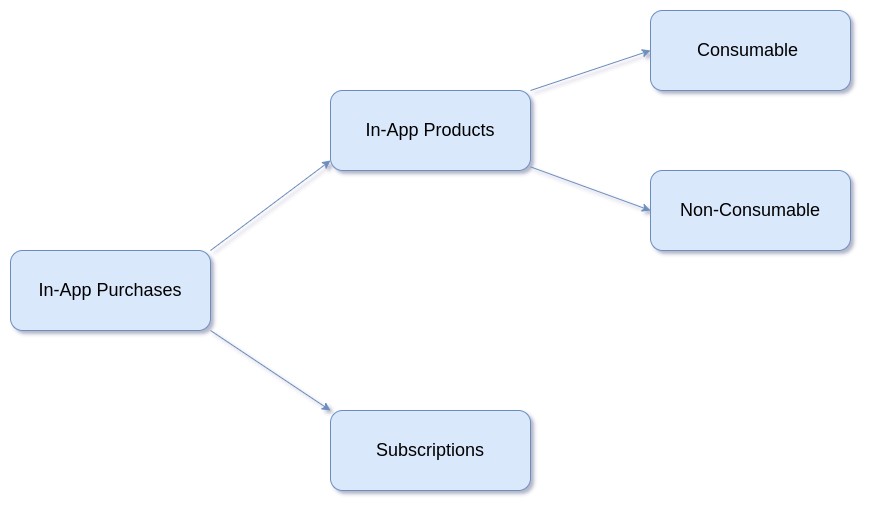
In-app purchases can vary from app to app and user to user. The following article aims to breakdown the different possible types and provide basic installation instructions.
How to integrate In-App Purchases in Android Applications
In this step by step guide we will describe the ways in which in-app purchases can be implemented in Android applications.
Transaction Fees:

In-app purchases will incur transactional fees toward Google. The transaction fee for all purchases in Google Play is 30% of the price that the user pays per transaction*. The end amount paid by buyers therefore, will be distributed. Developers receive 70% of the payment, and the remaining 30% goes to the distribution partner and operating fees.
*Accurate as of the date of publication
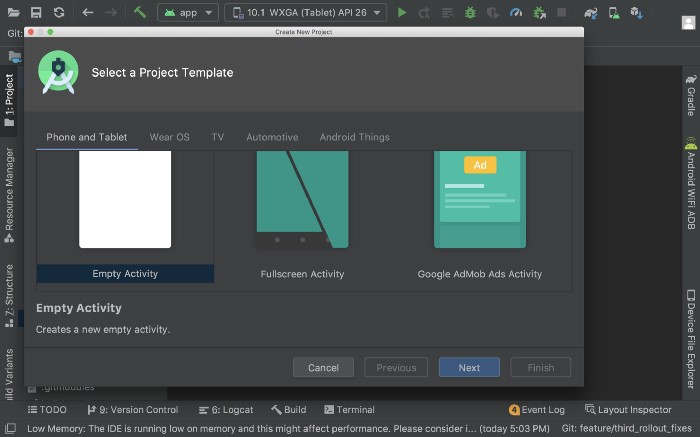
Step 1 - Create a new Android project:
As Illustrated here below simply select a project template:
Step 2 - Add the billing-client dependency into the build.gradle file:
For Kotlin use the above dependency because the KTX module contains Kotlin extensions and coroutines support, which will make the process a lot easier as we proceed.
dependencies {
  def billing_version = "3.0.0"
  //Kotlin
  implementation "com.android.billingclient:billing-ktx:$billing_version"
}
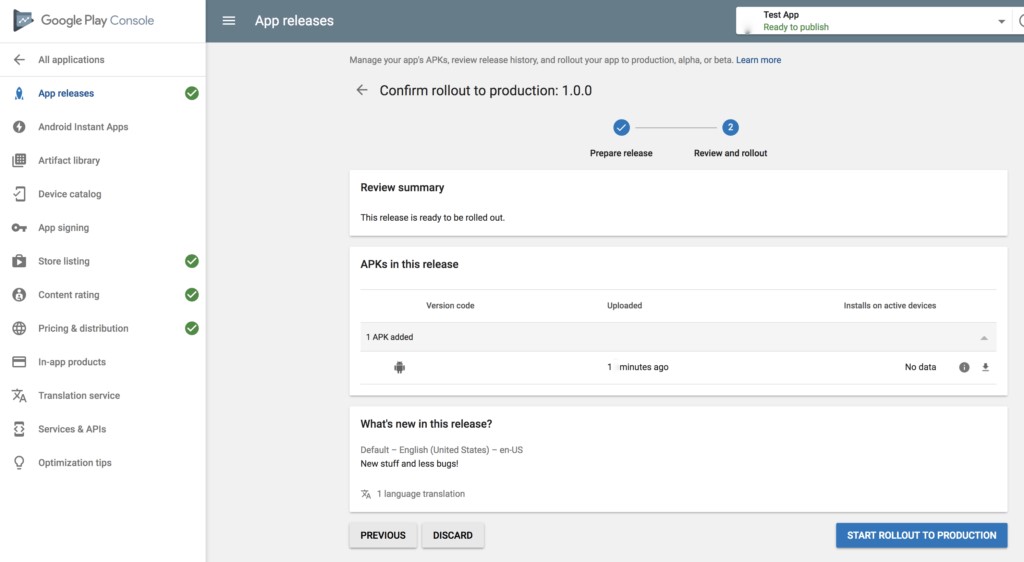
Step 3 - Upload an app to the Play Store:
Step 4 - Create the desired products:
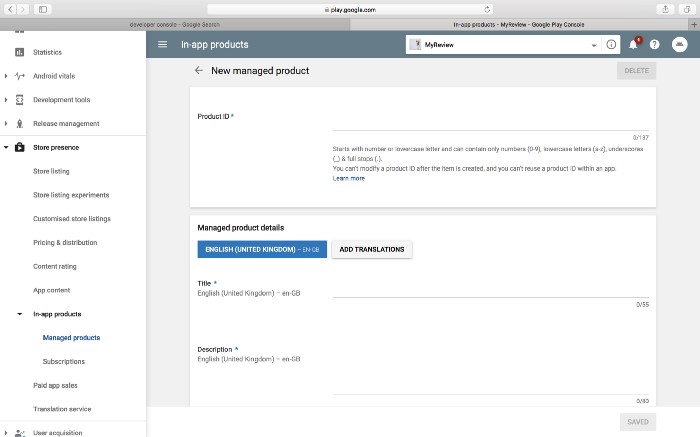
Select: Store presence → In-app products → Managed products. This is where we will be able to create the desired in-app purchases.
Select: Set up a merchant account, and fill in the form requesting basic information such as name, address, email, etc.
Select: CREATE MANAGED PRODUCT button. Then use the product-creation page, that should be similar to the example here below:
The Product ID will be unique you will not be able to change later. The next step will be to fill in the title and description with the relevant information. Remember to make sure to copy all the product IDs.
Step 5 - Initialize the billing client:

The above steps conclude the work that is needed for Google play, and now we can proceed with handling the flow of the in-app purchases.
First and foremost creating the method: In setUpBillingClient we can initialize the billing client, as follows:
private fun setUpBillingClient() {
  billingClient = BillingClient.newBuilder(this)
    .setListener(purchaseUpdateListener)
    .enablePendingPurchases()
    .build()
  startConnection()
}

private val purchaseUpdateListener =  PurchasesUpdatedListener {
  billingResult, purchases ->
  // To be implemented later.
}
We made use of the builder pattern provided in order to create the billing client instance. The PurchasesUpdatedListener should be provided, which is where all callbacks related to any initiated purchases will be received.
BillingClient is the main interface for communication between the library and the application code. It provides many convenient methods for in-app billing. We can create a class billing client instance for an application and use it to process in-app billing operations. It provides synchronous (blocking) and asynchronous (non-blocking) methods for many common in-app billing operations. All methods are supposed to be called from the UI thread and all the asynchronous callbacks will be returned on the UI thread as well.
Step 6 - Initiate the connection on the billing-client instance:
When we create the client instance, we need to start a connection on the instance created as follows: Once we receive the callback in onBillingSetupFinished, we can use billingResult.responseCode to check whether the connection was established successfully. Then, we can go ahead and launch the purchase flow or a query regarding one of the products.
private fun startConnection() {
  billingClient?.startConnection(object : BillingClientStateListener {
    override fun onBillingSetupFinished(billingResult: BillingResult) {
      if (billingResult.responseCode == BillingClient.BillingResponseCode.OK) {
        Log.v("TAG_INAPP","Setup Billing Done")
        // The BillingClient is ready. You can query purchases here.
        queryAvaliableProducts()
      }
    }
    override fun onBillingServiceDisconnected() {
      Log.v("TAG_INAPP","Billing client Disconnected")
      // Try to restart the connection on the next request to
      // Google Play by calling the startConnection() method.
    }
  })
}
Step 7 – A Query regarding the available products
We need to create a SkuDetailsParams instance to initiate a query for the SKU details. To do this, the list of the SKUs must be set up and their types set to SkuDetailsParams. Once the parameters are ready, call the querySkuDetailsAsync method on the BillingClient instance created.
private fun queryAvaliableProducts() {
  val skuList = ArrayList<String>()
  skuList.add("test.sample")
  val params = SkuDetailsParams.newBuilder()

 params.setSkusList(skuList).setType(BillingClient.SkuType.INAPP)

  billingClient?.querySkuDetailsAsync(params.build()) {
    billingResult, skuDetailsList ->

    // Process the result.
    if (billingResult.responseCode ==
        BillingClient.BillingResponseCode.OK &&
        !skuDetailsList.isNullOrEmpty()) {
      for (skuDetails in skuDetailsList) {
        Log.v("TAG_INAPP","skuDetailsList : ${skuDetailsList}")
        //This list should contain the products added above
        updateUI(skuDetails)
      }
    }
  }
}
Step 8 - UI Creation:

Now a simple Android view file can be created to display the details of Step 8 as follows:
Create the XML file, identifying the title and description fields so they display the info of the user specific layout.
Next, add one button so when a user selects it, the purchase flow will commence.
<?xml version="1.0" encoding="utf-8"?>
<androidx.constraintlayout.widget.ConstraintLayout
  xmlns:android="http://schemas.android.com/apk/res/android"
  xmlns:app="http://schemas.android.com/apk/res-auto"
  xmlns:tools="http://schemas.android.com/tools"
  android:layout_width="match_parent"
  android:layout_height="match_parent"
  tools:context=".MainActivity">

  <androidx.appcompat.widget.AppCompatTextView
    android:id="@+id/txt_product_name"
    android:layout_width="wrap_content"
    android:layout_height="wrap_content"
    android:text="Hello World!"
    android:paddingTop="30dp"
    android:visibility="gone"
    app:layout_constraintLeft_toLeftOf="parent"
    app:layout_constraintRight_toRightOf="parent"
    app:layout_constraintTop_toTopOf="parent" />

  <androidx.appcompat.widget.AppCompatTextView
    android:id="@+id/txt_product_description"
    android:layout_width="wrap_content"
    android:layout_height="wrap_content"
    android:text="Sample Description"
    android:paddingTop="10dp"
    android:visibility="gone"
    app:layout_constraintLeft_toLeftOf="parent"
    app:layout_constraintRight_toRightOf="parent"
    app:layout_constraintTop_toBottomOf="@id/txt_product_name"/>

  <androidx.appcompat.widget.AppCompatTextView
    android:id="@+id/txt_product_buy"
    android:layout_width="wrap_content"
    android:layout_height="wrap_content"
    android:text="BUY"
    android:background="@color/colorAccent"
    android:layout_marginTop="30dp"
    android:paddingTop="10dp"
    android:paddingBottom="10dp"
    android:paddingLeft="30dp"
    android:paddingRight="30dp"
    android:textColor="@android:color/white"
    android:typeface="monospace"
    android:textSize="16sp"
    android:visibility="gone"
    app:layout_constraintLeft_toLeftOf="parent"
    app:layout_constraintRight_toRightOf="parent"
        app:layout_constraintTop_toBottomOf="@id/txt_product_description" />


</androidx.constraintlayout.widget.ConstraintLayout>
Step 9 - Update the UI to correlate to the resulting ‘QueryPurchases’:
private fun updateUI(skuDetails: SkuDetails?) {
  skuDetails?.let {
    this.skuDetails = it
    txt_product_name?.text = skuDetails.title
    txt_product_description?.text = skuDetails.description
    showUIElements()
  }
}

private fun showUIElements() {
  txt_product_name?.visibility = View.VISIBLE
  txt_product_description?.visibility = View.VISIBLE
  txt_product_buy?.visibility = View.VISIBLE
}
Step 10 - Launch the purchase flow when the buy button is selected:
The billing flow should be launched as follows:
txt_product_buy?.setOnClickListener {
  skuDetails?.let {
    val billingFlowParams = BillingFlowParams.newBuilder()
                                             .setSkuDetails(it)
                                             .build()
    billingClient?.launchBillingFlow(this, billingFlowParams)?
                  .responseCode
  }?:noSKUMessage()
}
Step 11 - Handling the purchase result in ‘purchaseUpdateListener’:
If the response code of billingResult is ok, then the purchase will have been successful.
The next item that needs to be configured is the flow for both consumable and non-consumable purchases:
private val purchaseUpdateListener = PurchasesUpdatedListener {
  billingResult, purchases ->
  Log.v("TAG_INAPP",
    "billingResult responseCode : ${billingResult.responseCode}")
  if (billingResult.responseCode == BillingResponseCode.OK &&
      purchases != null) {
    for (purchase in purchases) {
      // handleNonConcumablePurchase(purchase)
      handleConsumedPurchases(purchase)
    }
  } else if (billingResult.responseCode ==
               BillingResponseCode.USER_CANCELED) {
   // Handle an error caused by user cancelling the purchase flow
  } else {
    // Handle any other error codes.
  }
}
Step 12 - Consumable and non-consumable purchases:
For non-consumable purchases, first identify the purchase through the billing client.
With consumable purchases, first you must call consumeAsync for the billing client:
private fun handleConsumedPurchases(purchase: Purchase) {
  Log.d("TAG_INAPP",
    "handleConsumablePurchasesAsync foreach it is $purchase")
  val params = ConsumeParams.newBuilder()
                .setPurchaseToken(purchase.purchaseToken)
                .build()
  billingClient?.consumeAsync(params) {
    billingResult, purchaseToken ->
    when (billingResult.responseCode) {
      BillingClient.BillingResponseCode.OK -> {
        // Update the appropriate tables/databases to grant user the items
        Log.d("TAG_INAPP",
              "Update the appropriate tables/databases to grant user the items")
      }
      else -> {
        Log.w("TAG_INAPP", billingResult.debugMessage)
      }
    }
  }
}

private fun handleNonConcumablePurchase(purchase: Purchase) {
  Log.v("TAG_INAPP","handlePurchase : ${purchase}")
  if (purchase.purchaseState == Purchase.PurchaseState.PURCHASED) {
    if (!purchase.isAcknowledged) {
      val acknowledgePurchaseParams = AcknowledgePurchaseParams.newBuilder()
                  .setPurchaseToken(purchase.purchaseToken)
                  .build()
                       billingClient?.acknowledgePurchase(acknowledgePurchaseParams) {
        billingResult ->
        val billingResponseCode = billingResult.responseCode
        val billingDebugMessage = billingResult.debugMessage

        Log.v("TAG_INAPP","response code: $billingResponseCode")
        Log.v("TAG_INAPP","debugMessage : $billingDebugMessage")
      }
    }
  }
}
Logging and In-App Purchases:

You will notice we incorporated a number of important logs. One of the most important places to use logging is with purchases. In the event that an end user has problems making a purchase, the user’s logs will give you the critical information necessary to discern exactly what caused the issue. Failure to successfully implement purchases in your mobile app will lead to, of course, loss in profits. Once you implement logs into your app, you will need to retrieve them from your end users’ devices with a third-party logging platform, like Shipbook.
Summary:
In this article we initially reviewed in-app purchases in general. We went on to cover the different types of in-app purchasing that can be developed and provided a step-by-step tutorial for integration of in-app purchasing in an Android app. In-app purchases are growing in popularity, they truly add value to your mobile app. Hopefully this article provided insight as to how to seamlessly integrate in-app purchases onto your app, enhancing app quality and user experience.