
Introduction
Unit testing entails the testing of the smallest parts of software, such as methods or classes. The main role of unit testing is to make sure the isolated part works as expected without integrating with third-party software, databases, or any dependency. To achieve this, software developers implement multiple testing techniques, like using stubs, mocks, dummies, and spies.
This post will show you why you should perform unit testing and how to implement it in your Android development project.
Benefits of Unit Testing
Unit testing allows you to catch software bugs early in the software development process, instead of QA finding them in the integration phase or end-to-end-testing, or, even worse, in the production environment. Moreover, as you develop your product, more features are added, meaning integration tests and end–to-end tests alone cannot cover all the corner cases. With unit testing, more corner cases are covered, which ensures your product meets the expected quality.
Benefits of Test-Driven Development (TDD)
Unit testing often goes along with the test-driven development (TDD) methodology, where developers first write the test, then write the feature code. At first, the tests will fail because the feature is not yet implemented. When the feature code is implemented, the tests will become green.
The huge benefit of TDD is that a software team can make sure the product is built and will meet the expected requirements, as demonstrated by the tests. Moreover, because developers write the tests first, they need to spend more time thinking about the product and what features the product has to cover; this way, the product being built will tend to have a higher quality.
Also, writing tests before writing product code will prevent developers from needing to refactor the code just to be able to write tests for it. For example, in the Go language, if the developers do not implement code with an interface, it’s very hard to write tests later on.
Example Application to Demonstrate Unit Testing
To better understand how to apply proper testing techniques for Android applications, let’s get your hands dirty by building a real application and then write tests for it. The application will show a list of popular movies for users to choose from as suggestions for their weekly movie night. Check out this GitHub repository for the full application code.
After opening the application, users will see a list of popular movies:
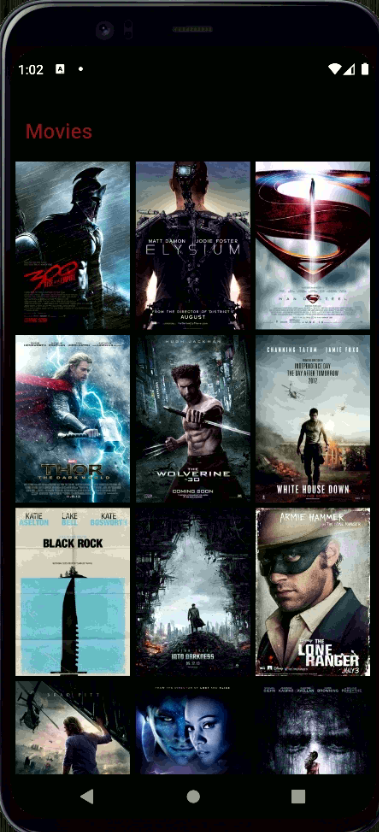
Figure 1: The movie suggestion application shown on a virtual device
You can then tap on a movie for details like its plot summary and cast:
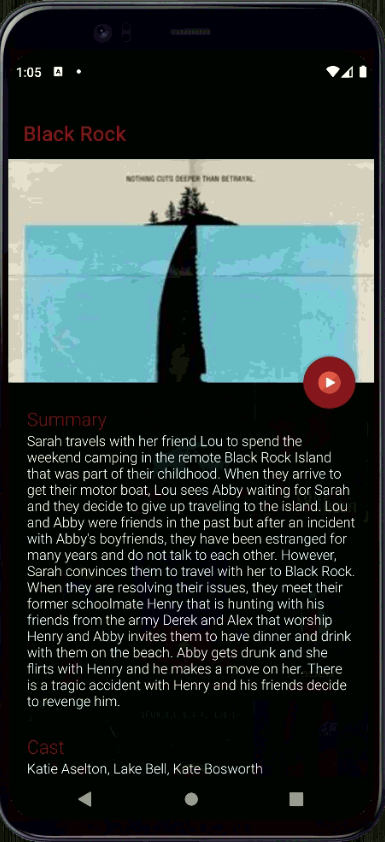
Figure 2: Details for the movie “Black Rock”
Unit Testing (Local Testing)
The unit test of our application will be run by a popular test runner called JUnit, a unit-testing framework that uses JVM languages like Java or Kotlin. If you’re not familiar with JUnit, you can learn more about it here. It helps you structure your tests, like what needs to be done first, what will be done last to clean data, and which data should be collected for the test report.
An Example of a Simple Unit Test
Okay, now let’s write an example unit test for the application.
We have the MovieValidator class in the utils package, which has the function isValidMovie:
import android.text.Editable
import android.text.TextWatcher
import java.util.regex.Pattern

class MovieValidator : TextWatcher {
  internal var isValid = false
  override fun afterTextChanged(editableText: Editable) {
    isValid = isValidMovie(editableText)
  }
  override fun beforeTextChanged(s: CharSequence, start: Int, count: Int, after: Int) = Unit
  override fun onTextChanged(s: CharSequence, start: Int, before: Int, count: Int) = Unit
  companion object {
    private val MOVIE_PATTERN = Pattern.compile("^[a-zA-Z]+(?:[\\s-][a-zA-Z]+)*\$")
    fun isValidMovie(movie: CharSequence?): Boolean {
      return movie != null && MOVIE_PATTERN.matcher(movie).matches()
    }
  }
}
To write the unit test for the function isValidMovie, we will first create a test class called MovieValidatorTest in the test folder. Then, we will need to import the MovieValidator class to test the isValidMovie in it.
The MovieValidatorTest will look like the following:
import com.fernandocejas.sample.core.functional.MovieValidator
import org.junit.Assert.assertTrue
import org.junit.Assert.assertFalse
import org.junit.Test
import mu.KotlinLogging
class MovieValidatorTest {
  private val logger = KotlinLogging.logger {}
  @Before
  fun setUp() {
    logger.info { "Starting the isValidMovie test" }
  }
  @Test
  fun isValidMovie() {
    assertTrue(MovieValidator.isValidMovie("The lord of the rings"))
    assertFalse(MovieValidator.isValidMovie("name@email"))
  }
  @After
  fun tearDown(){
    logger.info { "Finishing the isValidMovie test" }
  }
}
In the test file above, we implemented one test case to check the validity of the movie name. We also apply Before and After annotations to adding logging information so that we know when the test is about to start and when it is about to finish.
The Before and After annotations, help us structure our test scenario better. The Before annotation will be executed before every test, and the After annotation will be executed after every test. Developers often use these for setting up data for tests and then cleaning it up after testing is complete.
Notes: In order to install the logger library, we need to add the following code into our gradle configuration file.
implementation 'io.github.microutils:kotlin-logging-jvm:2.0.11'
When we run the test, we will see results as below:
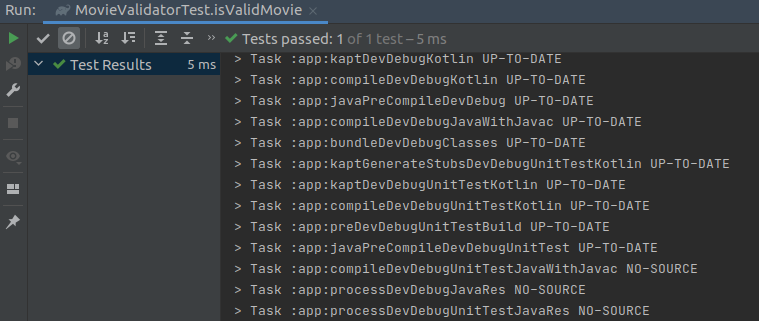
Figure 3: Tests passed for movie validator test case
The example unit test we just went over is very simple. But in real-world applications, you’ll need to deal with all kinds of dependencies and third-party APIs. How can we write tests for functions that interact with third-party dependencies?
When implementing unit testing, the best practice is to not deal with the real thing, like the real database, the real response from another API we take as input for the function, or any third-party dependencies. The reason for this is that when it comes to unit testing, we want to isolate the tests so that each test will test each unit. We could test the database or the third-party dependencies, but this will lead to flakiness in the tests. Instead, we’ll use “test doubles,” objects that stand in for the real objects when we implement the test. There are five types of test doubles: fake, dummy, stub, spy, and mock.
In this article, we’ll review the stub and mock types and use them for our example application.
- Stubs provide fake data to the test.
- Mocks check whether the expectation of the unit we are testing has been met.
How to Create Stubs and Mocks in a Sample Project
To better understand how to use a stub and a mock, let’s apply these techniques for writing unit tests in our movie suggestion app using MockK.
MockK is the well-known mock library in Kotlin, which provides native support for the Kotlin language. Users who are fond of the syntactic sugar of Kotlin will still be able to enjoy it with MockK. Moreover, since the default class and properties in Kotlin are final, using Mockito is considerably hard when mocking in Kotlin. But with MockK’s support, users won’t have to deal with that challenge anymore. To learn more about the benefits of using MockK over Mockito, check out this article.
To include the MockK library in your Android project, we need to add this line into the build.gradle.kts file:
testImplementation(TestLibraries.mockk)
The TestLibraries.mockk value is defined in Dependencies.kt as:
const val mockk = "io.mockk:mockk:${Versions.mockk}"
const val mockk = "1.10.0"
And that’s it.
So, let’s say we’re trying to test the class GetMovieDetails.
Initially, we usually implement the code without dependency injection like the following:
class GetMovieDetails : UseCase<MovieDetails, Params>() {
  private val moviesRepository = MoviesRepository()
  override fun run(params: Params) = moviesRepository.movieDetails(params.id)
  data class Params(val id: Int)
}
The MovieRepository class is as defined below:
class MoviesRepository {
  lateinit var context: Context
  lateinit var retrofit: Retrofit
  private val networkHandler = NetworkHandler(context)
  private val service = MoviesService(retrofit)
  fun movieDetails(movieId: Int): Either<Failure, MovieDetails> {
    return when (networkHandler.isNetworkAvailable()) {
      true -> request(
          service.movieDetails(movieId),
          { it.toMovieDetails() },
          MovieDetailsEntity.empty
      )
      false -> Left(NetworkConnection)
    }
  }
}
But writing code like this makes writing unit tests for this class impossible since we cannot mock dependency for the MoviesRepository class. Well, actually, we can write unit tests literally, but we’d need to use the real movie database, and this would lead to slower tests and make your test couple with third-party dependencies. Moreover, the problem with third-party dependencies is that they might not be working for other reasons, not because of our code.
The best practice when it comes to writing code that can be tested is applying dependency injection, which you can learn more about here.
First, we need to change the class MovieRepository to an interface type. The code for the interface MovieRepository will be changed as below:
interface MoviesRepository {
  fun movies(): Either<Failure, List<Movie>>
  fun movieDetails(movieId: Int): Either<Failure, MovieDetails>
  class Network
  @Inject constructor(
    private val networkHandler: NetworkHandler,
    private val service: MoviesService
  ) : MoviesRepository {
    override fun movieDetails(movieId: Int): Either<Failure,
    MovieDetails> {
      return when (networkHandler.isNetworkAvailable()) {
        true -> request(
          service.movieDetails(movieId),
          { it.toMovieDetails() },
          MovieDetailsEntity.empty
        )
        false -> Left(NetworkConnection)
      }
    }
  }
  ..
}
Then, the class GetMovieDetails will be written as below, with the constructor MovieRepository:
class GetMovieDetails {
  @Inject constructor(private val
  moviesRepository:MoviesRepository):
  UseCase < MovieDetails, Params > () {
    override fun run(params: Params) = moviesRepository.movieDetails(params.id)
    data class Params(val id: Int)
  }
}
In order to test this class without calling the real database, we need to mock the MoviesRepository class using MockK:
@MockK private lateinit var moviesRepository: MoviesRepository
The test function for the movieDetails function will be written as below:
class GetMovieDetailsTest : UnitTest() {
  private lateinit var getMovieDetails: GetMovieDetails
  @MockK private lateinit var moviesRepository:
    MoviesRepository
  @Before fun setUp() {
    getMovieDetails = GetMovieDetails(moviesRepository)
    every { moviesRepository.movieDetails(MOVIE_ID) } returns
    Right(MovieDetails.empty)
  }
  @Test fun `should get data from repository`() {
    getMovieDetails.run(GetMovieDetails.Params(MOVIE_ID))
    verify(exactly = 1) {
      moviesRepository.movieDetails(MOVIE_ID)
    }
  }
  companion object {
    private const val MOVIE_ID = 1
  }
}
In the setUp step, with @Before annotation, we initialize the getMovieDetails variable.
Then in the test function, we call the run function, with the input as GetMovieDetails.Params(MOVIE_ID. After that, we use the verify function, provided by MockK to check whether or not the call was actually made exactly one time.
Now, we will run the test to see whether it works or not. To run the test in Android Studio, click on the green button on the test method:

Figure 4: Log for the unit test run when testing GetMovieDetails class
Advantages and Disadvantages of Unit Testing
With unit tests in place, we can be confident that our logic is met and we will be notified if any changes are made that break the existing logic. In addition, the unit tests are run blazingly fast. Still, we’re not sure if users can interact with the application as we expect.
That’s where UI testing comes into play.
UI Testing (Instrumentation Testing)
Traditionally, automated end-to-end testing is usually done in a blackbox way, meaning we create another project for automated end-to-end testing of the application. We need to find the locator of the elements in our application and find a way to interact with it via a framework such as Appium or UIAutomator. However, this approach is more time-consuming since we have to redefine the locators of the elements in our application; also, Appium is pretty slow when interacting with the real mobile application.
To be able to resolve the drawbacks of Appium, we’ll apply instrumentation tests with the help of the Espresso and AndroidX frameworks.
How to Implement UI in a Project
Let’s say we want to check whether the movie list button is shown and is clickable.
The MoviesActivity is defined as following:
class MoviesActivity : BaseActivity() {
  companion object {
    fun callingIntent(context: Context) = Intent(context, MoviesActivity::class.java)
  }
  override fun fragment() = MoviesFragment()
}
The actual logic and how the movies page is rendered is defined in the MoviesFragment class:
@AndroidEntryPoint
class MoviesFragment : BaseFragment() {
  ...
  private fun loadMoviesList() {
    emptyView.invisible()
    movieList.visible()
    showProgress()
    moviesViewModel.loadMovies()
  }

  private fun renderMoviesList(movies: List<MovieView>?) {
    moviesAdapter.collection = movies.orEmpty()
    hideProgress()
  }
  ...
}
The test class will be written like the following:
class MainApplicationTest {
  @get:Rule
  val mActivityRule = ActivityTestRule(MoviesActivity::class.java, true, false)

  @Before
  fun setUp() {
    mActivityRule.launchActivity(null)
    Intents.init();
  }

  @After
  fun tearDown() {
    Intents.release();
  }

  @Test
  fun clickMovieListButton() {
    val movieListButton = onView(withId(R.id.movieList))
    movieListButton.perform(click())
    val moviePoster = onView(withId(R.id.moviePoster))
    moviePoster.check(matches(isDisplayed()))
  }
}
In the test class, we need to specify the activity of the application we want to run, in this case, MovieActivity.
  @get:Rule
  val mActivityRule = ActivityTestRule(MoviesActivity::class.java, true, false)
Before the test is run, the activity will be initialized.
  @Before
  fun setUp() {
    mActivityRule.launchActivity(null)
    Intents.init();
  }
Then after the test is done, we will close the activity.
  @After
  fun tearDown() {
    Intents.release();
  }
For the test itself, we find the movieList element, and click on it.
  @Test
  fun clickMovieListButton() {
    val movieListButton = onView(withId(R.id.movieList))
    movieListButton.perform(click())
    val moviePoster = onView(withId(R.id.moviePoster))
    moviePoster.check(matches(isDisplayed()))
  }
After running the test by clicking on the green button, we can see the test has passed:
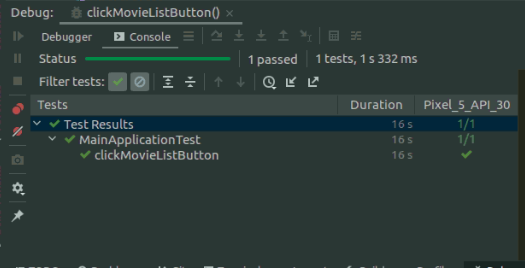
Figure 5: Test result for instrumentation testing
Advantages and Disadvantages of Instrumentation Tests
So, with instrumentation tests, we can be confident that users can interact with the UI and the functionalities work as expected per our business requirements. And the speed is pretty amazing.
But the drawback of instrumentation tests is that after every change in production code, you will need to change the test code since the test is affected by both the user interface and the business logic.
Conclusion
Creating a working Android application is not a hard task. But to be able to create a high-quality application that’s reliable over time is very difficult. You need to run a lot of tests, from unit tests and integration tests to end-to-end tests. Each test has its own role to play in the success of your product. Creating tests not only ensures high quality, but also gives developers the confidence they need to add new features later on without worrying that new code will break existing functionality. So make sure you implement all of them before releasing your application on the market.
Still, writing tests is a daunting task, so you also need to take your time implementing them. Moreover, debugging tests to know why they failed requires much time and effort too. If you’re having a hard time debugging your tests, or even get stuck in them, check out Shipbook, a logging platform that can help you quickly debug issues in your tests. Shipbook provides numerous resources and documents to help you test your applications, along with logs to easily discover the root cause of that bug you’re struggling with.